So with the newly overhauled Taskbar in Windows 7 and the venerable OSX/Leopard Dock, come a plethora of alternative Linux docks to choose from. Theres Cairodock, Gnome-Do's new dock, Trayer (actually an older GNOME panel alternative), Stalonetray (STAnd-aLONE-TRAY panel) and my favorite, AWN/AWN-Curves (and thus the subjects of this post). NOTE: My earlier post on installing Screenlets can be found HERE.
This post is broken up into the following 3 parts:
PART I: Installing Avant Window Navigator
PART II: Installing Stalonetray
PART III: Removing GNOME panels & other tips
PART I: Installing Avant Window Navigator
To start with, we're gonna install the Avant Window Navigator (AWN from here on out) from the repositories. As usual, I'll show you how to do this in the terminal (for you aspiring keyboard punchers out there) and also through the Synaptic GUI.
In the terminal, type
sudo apt-get install avant-window-navigator
Type 'y' when prompted to install the additional packages.
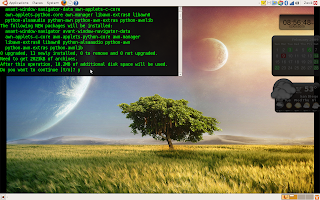
To install the so-called "extra" packages, enter
sudo apt-get install awn-applets-python-extras awn-applets-c-extras
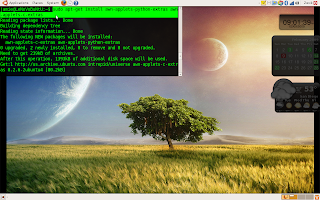
To do this through the GUI, open up the Synaptic Package Manager (either alt+f2 & "gksudo synaptic" or System > Administration > Synaptic Package Manager) then search for 'avant.'
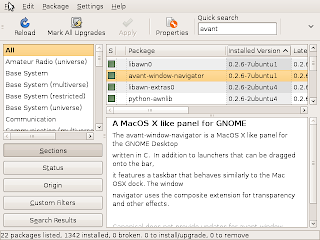
Select the avant-window-manager, right click and select 'Mark for Installation' to install AWN and its dependencies. You may as well select the extras (awn-applets-python-extras and awn-applets-c-extras) to get full use from the install. Click 'Apply' and wait for all of the files to be installed before closing the Synaptic window.
AWN can be opened through the Accesories menu (under Applications) or by open the Run Application window (alt+f2) and entering 'avant' (the full command is avant-window-navigator but it should start to appear automatically once 'avant' is typed).
This is how it looks for now with a couple of applications running.
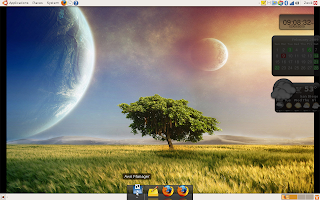
Looks more yawn then AWN. Lets change that. Open the AWN Manager by clicking its icon. From here, you can tweak the rollover effects of the icons (I keep mine on 3D spotlight turn) and adjust a number of other settings. I recommend also selecting the 'Bar Appearance' tab and changing the 'Look' to 3D.
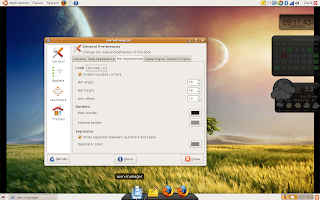
APPLETS & LAUNCHERS
You can also select the Applets Menu to add a plethora of applets (especially if you opted to install the extras) such as file browsers, trash can, weather apps, terminals, etc. To install your own application Launchers, select 'Launcher' and click 'Add.' Most apps can also be dragged-and-dropped from the Applications Menu directly onto the AWN dock (this also saves time cuz now you don't havta sift through all your icons searching for the right one).
To find the appropriate command for launching your favorite apps, go to the Main Menu editor (System > Preferences > Main Menu OR right-click the Ubuntu icon in the upper left corner of the screen and select 'Edit Menus').
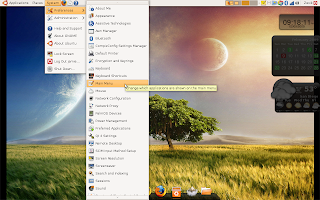
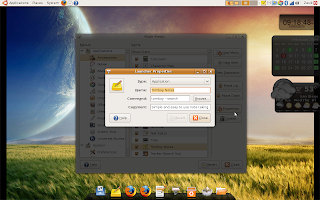
Locate the program you wish to add, and click Properties to view the command. Copy the command from the Main Menu editor, and paste it into the 'command' section of the AWN-manager Launcher-add window. Also, click on the blank icon to select a custom icon for the AWN toolbar.
AWN THEMES
Themes and skins can be found HERE and with a quick Google search. They can be installed and applied through the Themes menu within the AWN-manager. If you choose to remove the AWN-manager icon from the dock, it can be launched by entering 'awn-manager' in the Run Application dialog or by right-clicking on the dock and selecting 'Preferences.'
From AWN to AWN-Curves
Now lets add some curvature. To do this, we'll need to access the Configuration Editor, but chances are you've never used this, so lets add it to the menu first. Open the Menu Editor (right-click Ubuntu icon > Edit Menus) and under 'System Tools,' check the box next to Configuration Editor. Close the Main Menu editor, and it should now be accessible in the Applications menu.
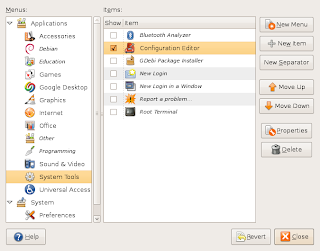
Now that its available, open the Configuration Editor, and under 'apps' find 'avant-window-navigator' then select 'bar' and alter the following values accordingly:
bar_angle = -1
bar_height = (anything from 45 to 50)
bar_pos = (anything from 0.5 to 0.6)
corner_radius = 40
curves_symmetry = (anything from 0.2 to 0.3)
curviness = 1
icon_offset = (anything from 5 to 8)
You can instantly see the effects of your choices, so feel free to mess around for a bit. Exit the editor and the changes are automatically saved. You may notice that some of the launchers don't quite fit right on the curved bar, but for most of these, there is an alternative which works just fine. I also recommend opening the AWN-Manager and tweaking the settings under Bar Appearance and Glass Engine. Have fun picking whatever works for you!
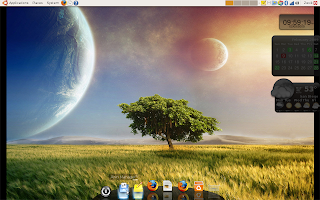
Please note that if you choose to have AWN fully replace both the the top and bottom panel, make sure you add all of the necessary applets and launchers to access the menu and exit GNOME. I have chosen to delete the bottom panel, and keep the top one hidden (both can be done by right-clicking on the panels and selecting the appropriate options). Also, to view the effects of some of the above options, a restart or reload of the dock may be needed. Simply right-click and close AWN, then relaunch it from the Run Application dialog.
Adding AWN to Startup
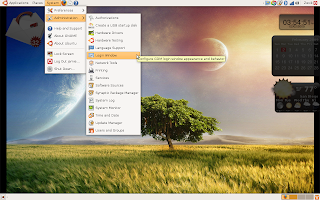
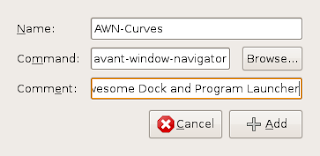
To ensure that AWN appears upon startup, open the Sessions window (System > Preferences > Sessions). Click 'Add' and for the command window key in 'avant-window-navigator.' Fill in the other boxes and close the Sessions window.
PART II: Installing Stalonetray
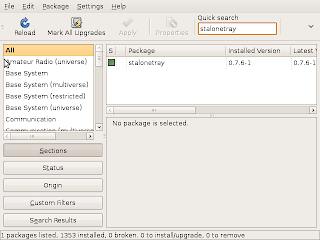
To install Stalonetray, enter into the terminal 'sudo-apt-get install stalonetray' or search 'stalonetray' in the Synaptic Package Manager (Settings > Administration > Synaptic Package Manager).
Download stalonetray.txt, and save it into your $HOME folder as .stalonetrayrc (right click > save link as). If the link is broken, feel free to email me and I can send you a copy of my settings file.
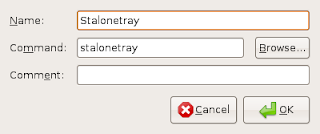
Add stalonetray to your startup by following the same methods for AWN as above. The command to be added to the Sessions dialog is 'stalonetray.' To run it in this session, open up the Run Dialog box and type the above command, 'stalonetray.'
To edit the tray to your own preferences, open the .stalonetrayrc file in your preferred text editor and the options are pretty straightforward. Enjoy!
PART III: Removing GNOME Panels and Other Tips
Removing the GNOME Panels
Whichever panel you remove first, is easily done with a right-click > Delete this panel. The remaining panel is a bit trickier. These instructions are specifically for Ubuntu 8.10 (although it should work with earlier versions, instructions for 8.04 can be found HERE).
PLEASE NOTE: If you plan on completely removing the panels, be sure you've added all necessary launchers and applets to AWN, staylonetray, or as screenlets (ex - Applications menu, File Browser, Clock, Logout Option, Volume, Trash, etc.).
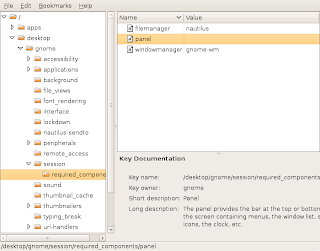
First you'll need to open the Configuration Editor. Instructions for installing the editor are posted above in the section on how to curve AWN. To open the editor, open the Run Application dialog and enter 'gconf-editor.' Then go to desktop > gnome > session >required_components_list and remove the value entered into 'panel.' You'll need to logout and back in in order to see the effects.
Pidgin Screenlet
I already have a post for installing Widgets/Screenlets, but since it is featured in the title screenshot and not a default Screenlet, I figured its okay to include here. First, download the Pidgin Screenlet (if the link is broken, just do a search for 'PidginScreenlet-0.3.3.tar.gz). Then open up the Screenlets manager, and click 'Install,' select 'Install Screenlet' (the default) from the dropdown menu, and locate the .tar.gz file you downloaded. After the screenlet is properly installed, you can delete the archived file.
In order for the screenlet to work, you must be logged into Pidgin, so you might as well ad Pidgin to the startup Session manager as well with the launch command 'pidgin' (instructions are given several times now in this post).
Bonus AWN Plugins
As far as I know, there are two popular apps in particular which have specific AWN plugins - Pidgin (formerly GAIM, a multiple-faceted IM program) and the pre-1.0 release versions of Banshee (the Ubuntu version of iTunes). I'm sure a quick google search can turn up the older Banshee .deb install files as well as a quick tutorial on getting the plugin to work. Unfortunately, as of the date of this post, no such extension has been written for version 1.0 or above.
Pidgin Plugin - Status & Message Icon
Be sure to add Pidgin to your dockbar, then download the plugin HERE. Then open your home folder, and either press 'Ctrl+H' or click 'View' and select 'Show Hidden Files'. Open the .purple directory, create a new folder called 'plugins' and extract the downloaded files into this new directory (not the pidgin_awn folder, but the actual .so and .c files ).
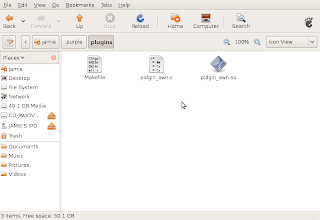
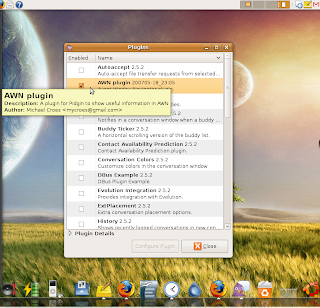
Delete the downloaded archive file (the one ending in .tar.gz) and open Pidgen itself. Now go to Tools > Plugins and check the box next to 'AWN Plugin,' and click 'close.' Notice the icon on AWN has now changed, and will continue to change dynamically according to your status and whenever someone sends you a message.
